Welcome to Moda!
Starry Pinwheels Quilt
Starry Pinwheels Quilt
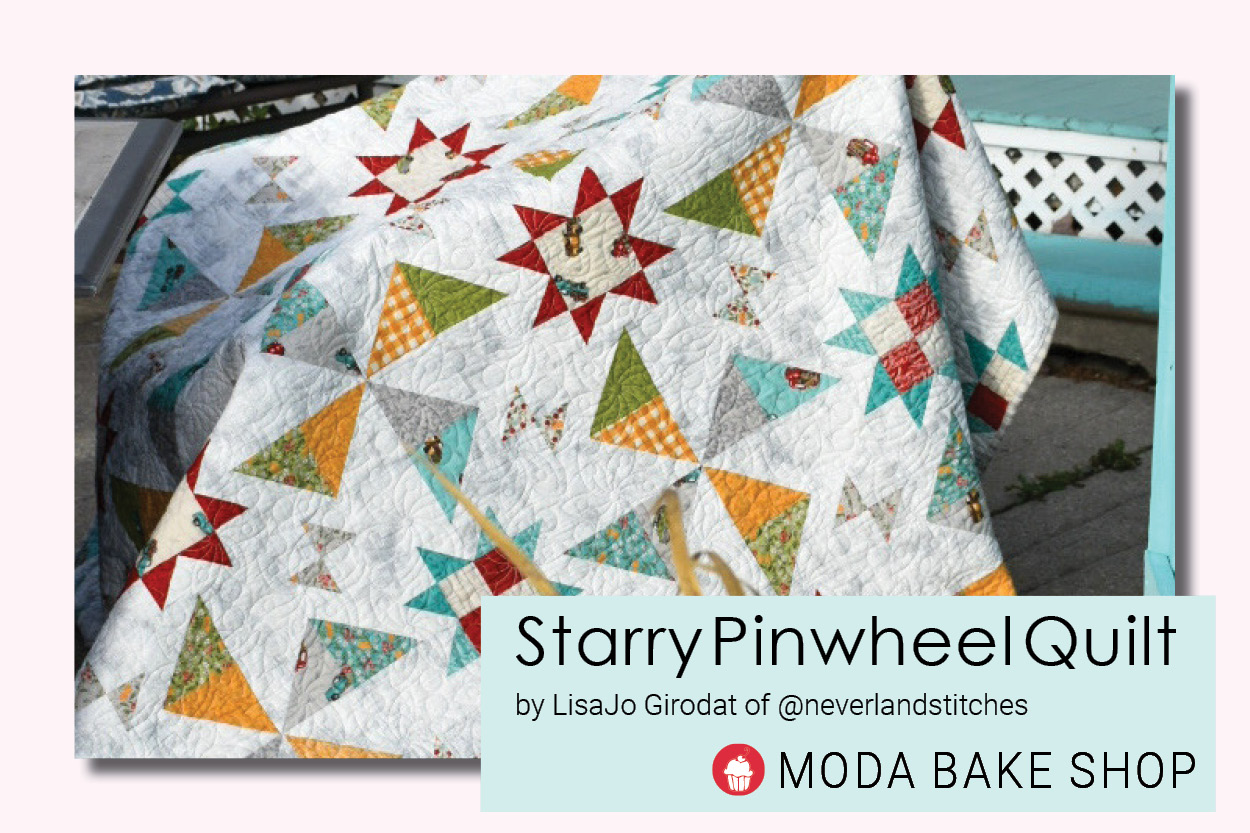
My original quilt was made with Deb Strain’s Cultivate Kindness collection, however any Moda collection would work very well with this pattern. I've include a few digital images of how this quilt would look made in a few of the coming-soon collections by Moda Designers.
RST = Right sides together
WOF = Width of fabric
All seams are ¼ inch
YIELD
Quilt Size: 72 inches square
Block Size: 24 inches (quilt uses 9 blocks)
Or use just 4 blocks to make a sweet baby quilt.
INGREDIENTS
- 1 FQB of your favorite Moda Fabric Line (I used Deb Strain’s Cultivate Kindness 19930AB)
- 3 ¾ yards of a background fabric (Basic Grey’s Metropolis Fog 30150-435)
- 5/8 yard fabric for Binding (19935-11)
- 5 yards of fabric for the Backing (19935-14)
Cut:
From the Background Fabric:
- (5) 3 inch WOF strips of background fabric; sub cut into 72 squares for HST
- (9) 2.5 inch WOF strips of background fabric; Sub cut into 144 2.5 inch squares
- (8) 4.5 inch WOF strips of background fabric; sub cut into 72 4.5 inch squares
- (8) 5 inch WOF Strips of background fabric; sub cut into 72 5 inch squares for HST
- (3) 4.5 inch WOF strips of background fabric; Sub cut into (36) 2.5 x 4.2 inch rectangles for flying geese
From a Teal Print 1 [ for corner units]:
- (3) 3 inch WOF strips of a floral print for HSTs;sub cut into (36) 3 inch squares
From a low volume print 1 [for corners]:
- (2) 2.5 inch WOF strips of a low volume; sub cut into (18) 2.5 inch squares
From a Red Print [for corners and flying geese]:
- (6) 2.5 inch WOF strips of a red print; sub cut into (90) 2.5 inch squares [(8) squares will be used for the flying geese in the center of each block)
From a low volume print 2 [for the center of the block]:
- (1) 4.5 inch WOF strip; Sub cut into (9) 4.5 inch square
From a floral print:
- (3) 3 inch WOF strips of a floral print; sub cut into (36) 3 inch squares for HSTs
From a green print:
- (2) 5 inch WOF strips of a green print for HST’s; sub cut into (18) 5 inch squares
From a yellow print:
- (2) 5 inch WOF strips of a yellow print for HST’s; sub cut into (18) 5 inch squares
From a grey print:
- (2) 5 inch WOF strips of a grey print for HST’s; sub cut into (18) 5 inch squares
From a teal print 2:
- (2) 5 inch WOF strips of a teal print 2 for HST’s; sub cut into (18) 5 inch squares
INSTRUCTIONS
STEP 1 - MAKE THE FLYING GEESE
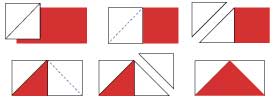
Draw a diagonal line on the back of (72) 2.5 inch red squares. Place a red square right sides together on the right hand side of a 2.5 x 4.5 inch Background Fabric rectangle. Sew along the line and trim ¼” away from the seam. Press out. Repeat on the left hand side, creating a flying geese unit. Trim to 2.5 x 4.5 inches. Make a total of (36) flying geese units.
STEP 2 – MAKE 4.5" HALF SQUARE TRIANGLES (HST)
Draw a diagonal line on the wrong side of all (72) Background Fabric 5” squares.
Begin with the (18) 5 inch Green Print Fabrics. Place 1 square right sides together with Background Fabric 5 inch squares square. Sew ¼” away from each side of the marked line. Cut in half on the line and press open. Trim to 4.5 inches square. You will have a total of 36 Green/Background Fabric HST’s.
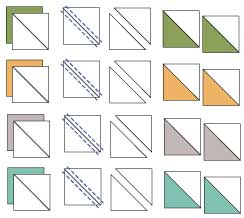
Repeat to make 36 Yellow Print / Background Fabric 4.5 inch HSTs.
Repeat to make 36 Grey Print / Background Fabric 4.5 inch HSTs.
Repeat to make 36 Teal Print 2 / Background Fabric 4.5 inch HSTs.
STEP 3 – MAKE 2.5" HALF SQUARE TRIANGLES (HST)
Draw a diagonal line on the wrong side of all (72) Background Fabric 3” squares.
Begin with the (36) 3 inch Floral Print Fabrics. Place 1 square right sides together with Background Fabric 3 inch squares square. Sew ¼” away from each side of the marked line. Cut in half on the line and press open. Trim to 2.5 inches square. You will have a total of 72 Floral Print/Background Fabric HST’s.
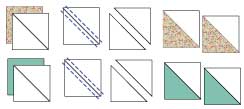
Repeat to make 36 Teal Print 1 / Background Fabric 2.5 inch HSTs.
STEP 4 – ASSEMBLE CORNER UNITS
For Each corner unit use one 2.5 inch background fabric square, one 2.5 inch low volume print 1 square, and two 2.5 teal print 1 / background fabric HSTs. Make a total of 18 units.
The Corner units should measure 4.5 inches and should look like the illustration below:

Repeat the above using the 2.5 inch red print fabric squares to make another 18 corner units.

STEP 5 – ASSEMBLE BLOOM UNITS
For each bloom unit use (2) 2.5 inch squares of background fabric and (2) 2.5 inch Floral print/background fabric HSTs. Make a total of 36 Bloom Units. The Bloom units should measure 4.5 inches and should look like the illustration below:

STEP 6 – MAKE CENTER STARS
For each Center Star you will need (1) 4.5 inch square of Low Volume print 2, (4) 2.5 inch squares of background fabric, and (4) 2.5 x 4.5 inch flying geese units. The Center Stars should look like the illustration.
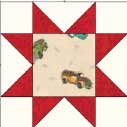
Repeat to make (9) Center stars.
STEP 7 – BLOCK ASSEMBLY
Use the Block Illustration as a reference and assemble the block. The quilt block will measure 24.5 inches square.
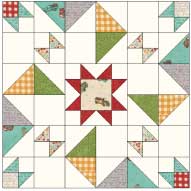
Repeat to make a total of (9) 24.5 inch blocks.
ASSEMBLE THE QUILT
Sew together the 9 24.5 inch blocks in 3 rows and 3 columns for a 72 inch square quilt.
Quilt as desired, bind, wash and snuggle!
Alternate colorway - Boudoir by BasicGrey
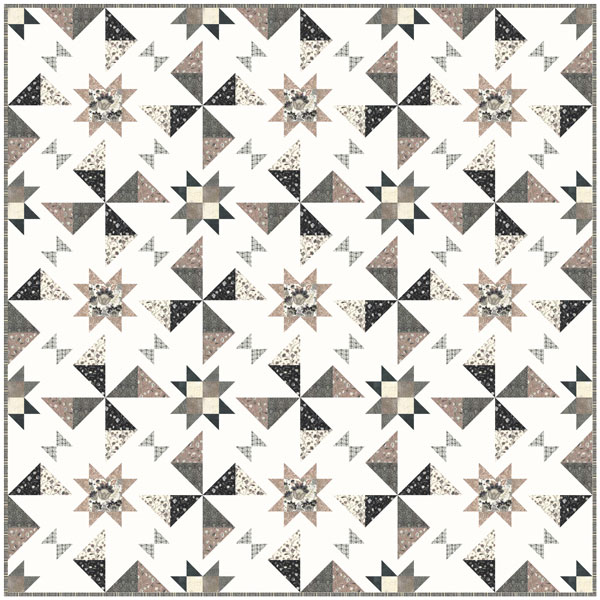
Alternate colorway - Break of Day by Sweetfire Road
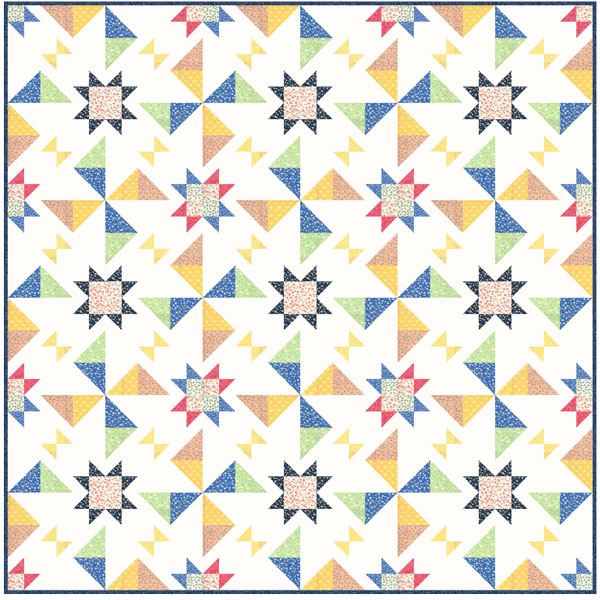
Lisa Jo Girodat
IG: @neverlandstitches

Comments